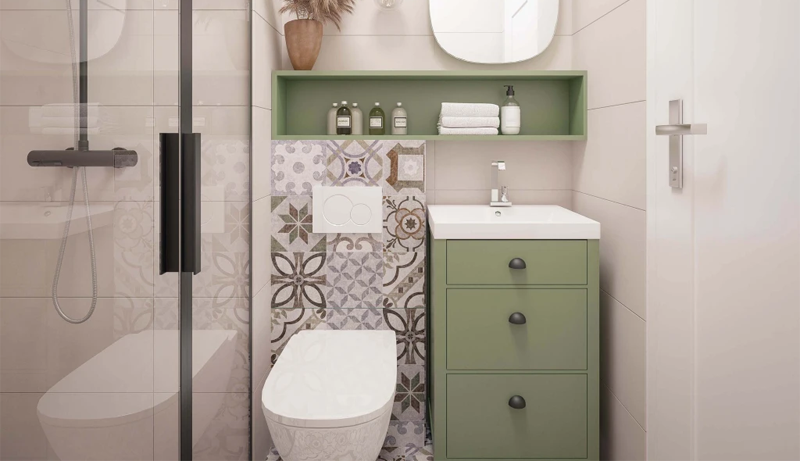
A bathroom’s bath cabinet is a useful and practical piece of bathroom furniture. It is typically expensive to purchase. But with a lot less work, you may create your own that is excellent and durable.
So, pay attention all the way through and become an expert in this enjoyable DIY project.
Purchase the Cabinet Doors
In reality, it takes a long time to make cabinet doors. You can purchase cabinet doors and then cut them to your specifications to save yourself the hassle.
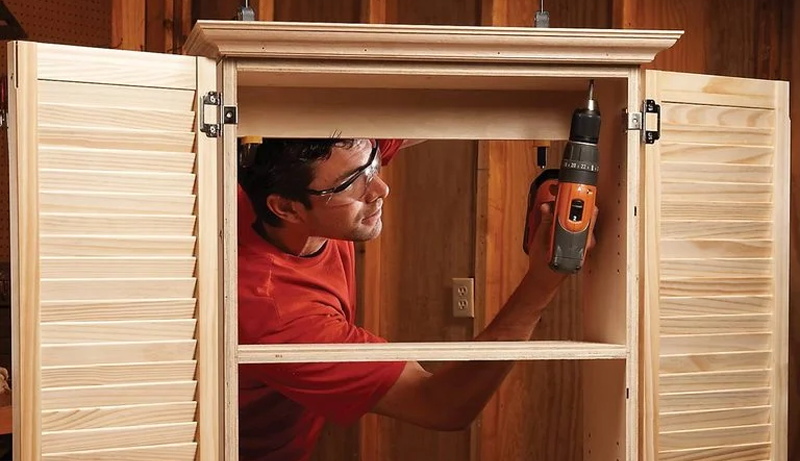
Create A Simple Box
To make the box, plywood must be cut. To create the lengthy, straight cuts, you might use either a table saw or a circular saw.
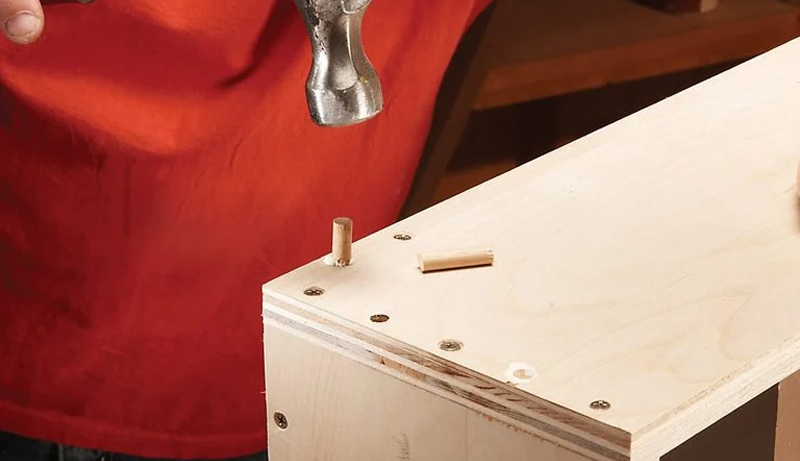
Use glue, nails, and dowels to assemble.
The box must then be put together using screws, glue, and wood dowels in the following phase. You can buy long dowels and chop them down afterwards.
Drilling 1/8-inch countersink and pilot holes would be beneficial. The bottom, top, and cleats should be fastened to one side before the other. Check the box’s diagonal measurements before striking the spots.
Drill Holes For Supporting The Shelf
Make holes for adjustable shelf supports when the box is complete using a brad-point drill bit. 1/4-inch-wide supports are required for the majority of the shelf.
Using a scrap of pegboard, you may drill and place the holes for the shelf supports. In order to ensure that the holes are precisely the right depth, you might use a method in this stage where you wrap masking tape around the drill bit.
Cut The Doors
Cut the door with the use of a handmade saw. It’ll guarantee a straight cut. Here, recommendations can be a big assistance in maintaining the door’s proper size. A straight strip of 3/4-inch plywood measuring 13 by 14 by 18 inches should be fastened to create a guide.
The excess plywood was then removed by cutting along 13. By outlining the precise cutting path, it will produce a guide that will direct the saw in a straight line.
Install The Hinges
The hinges should be attached to the doors three inches from the ends.
For perfectly positioned hinges, drill bits that perform the dual function of self-centering and nail placement must be used on louvred doors because their front and rear sides have a similar appearance.
Place The Doors
Hold both doors in place while mounting the hinges properly. For an accurate and perfect fit, the hinges must be attached from the inside.
The crown moulding’s shape
You must measure the top of the cabinet and the cabinet’s doors in order to create the crown moulding. You can then cut the crown from plywood and base the required frames after taking that measurement.
To cut the moulding, tilt the mitre saw at a 45° angle. The crown molding will be installed sloping and upside-down in opposition to the fence.
Crown Moulding and Frame together
With the frame, secure the crown moulding. Attach the mitered corners if necessary. If they all fit snugly and appear to be properly aligned, glue them all together.
Midpoint Crown Molding
Attach the front portion of the crown while maintaining the incorrect position of the sides. Nails should be used to hold the molding in the center on the bathroom cabinet.
The cabinet should then be positioned above the base’s center by being attached in the same manner. With the cabinet, fasten the bottom and the crown.
Any color you want
Before coloring, there are a few finishing touches to be made. These include filling in any undesirable voids in the wood and using wood filler to hide the heads of dowels, screws, and nails.
A stain-repelling white primer needs to be sprayed liberally throughout. After the primer has dried, apply at least two coats of paint and softly sand the surface once more.
As you can see, creating bathroom cabinets is a straightforward procedure that everyone can master. Therefore, you no longer need to spend a lot of money to fill the empty space in your bathroom with one of the most functional and aesthetically pleasing pieces of furniture.